TL;DR
- Import a GitHub profile into ApplyJobGPT, then convert the repositories into a resume profile, a tailored cover letter, and interview talking points.
- The full process takes about 10 to 15 minutes for a profile with three to six public repositories.
- A GitHub profile URL, a target job description, and a free ApplyJobGPT account are needed before starting.
- By the end, three documents exist: a resume section built from real project evidence, a cover letter referencing specific work, and a set of interview notes pulled from commit history and technical decisions.
Who This Tutorial Is For
This walkthrough is built for students and early-career applicants whose strongest evidence of skill sits in GitHub rather than on a resume. A computer science student with three solid side projects and one internship often struggles more with translating that work into application language than with the work itself. Recent graduates applying for their first engineering or data role face the same gap: the technical depth is there, but it rarely makes it onto the page in a form a recruiter or ATS will register.
This is also useful for anyone who does not want to manually re-describe the same project five different ways across five different applications.
What Is Needed Before Starting
- [ ] A GitHub profile with at least one public repository
- [ ] A free ApplyJobGPT account
- [ ] 5 minutes only
Why This Feature Helps
Describing a GitHub project well on a resume is harder than it looks. Most students either undersell it ("built a website using React") or describe it in a way that only another developer would understand, neither of which helps a recruiter or hiring manager scanning quickly.
The job description usually asks for specific signals: a particular stack, a type of problem solved, evidence of working with APIs or databases or deployment. A repository README rarely maps cleanly onto JD language without someone manually drawing the connection, and that connection gets missed more often than not when an application is the fifth one written that day.
ApplyJobGPT's GitHub import is designed to close that gap. It reads the actual README files, commit messages, and documentation inside each repository, and turns that material into structured evidence: what was built, which stack was used, and what problems came up during development. That evidence then feeds into resume bullets, cover letter content, and interview notes.
None of this replaces a careful read-through before submitting. The output is a draft built from real material, not a finished, ready-to-send document. Review and editing still matter, especially to confirm that every claim matches what was actually built.
Step-by-Step: How to Turn GitHub Repos Into Application Materials
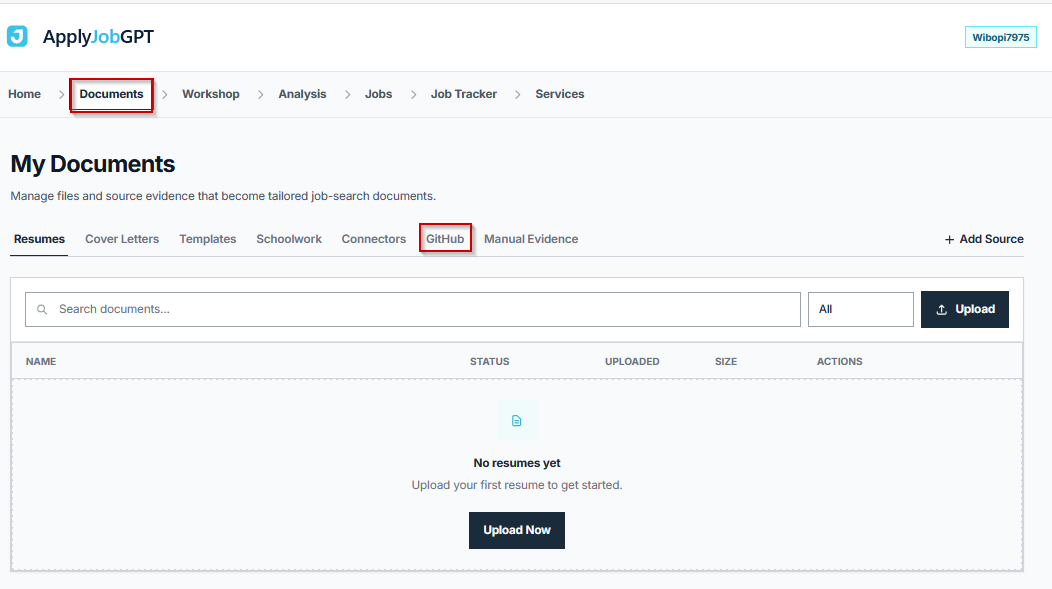
Step 1 — Open Documents and Select the GitHub Tab
Goal: Reach the import screen where GitHub data gets connected to the profile.
From the main navigation bar, Documents opens a panel with several tabs. Selecting the GitHub tab brings up a search field and an import form. Nothing has been imported yet at this point; this step only opens the door.
Before moving on, check this:
- [ ] The Documents panel is open
- [ ] The GitHub tab is selected and the import form is visible
Step 2 — Paste the GitHub Profile URL and Import
Goal: Pull repository data from a public GitHub profile into ApplyJobGPT.
Pasting a full profile URL (for example, https://github.com/username) into the import field and clicking Import starts the process. ApplyJobGPT reads every public repository attached to that profile. Private repositories are skipped automatically; only public ones get imported, so anything meant to be included needs to be public before this step runs.
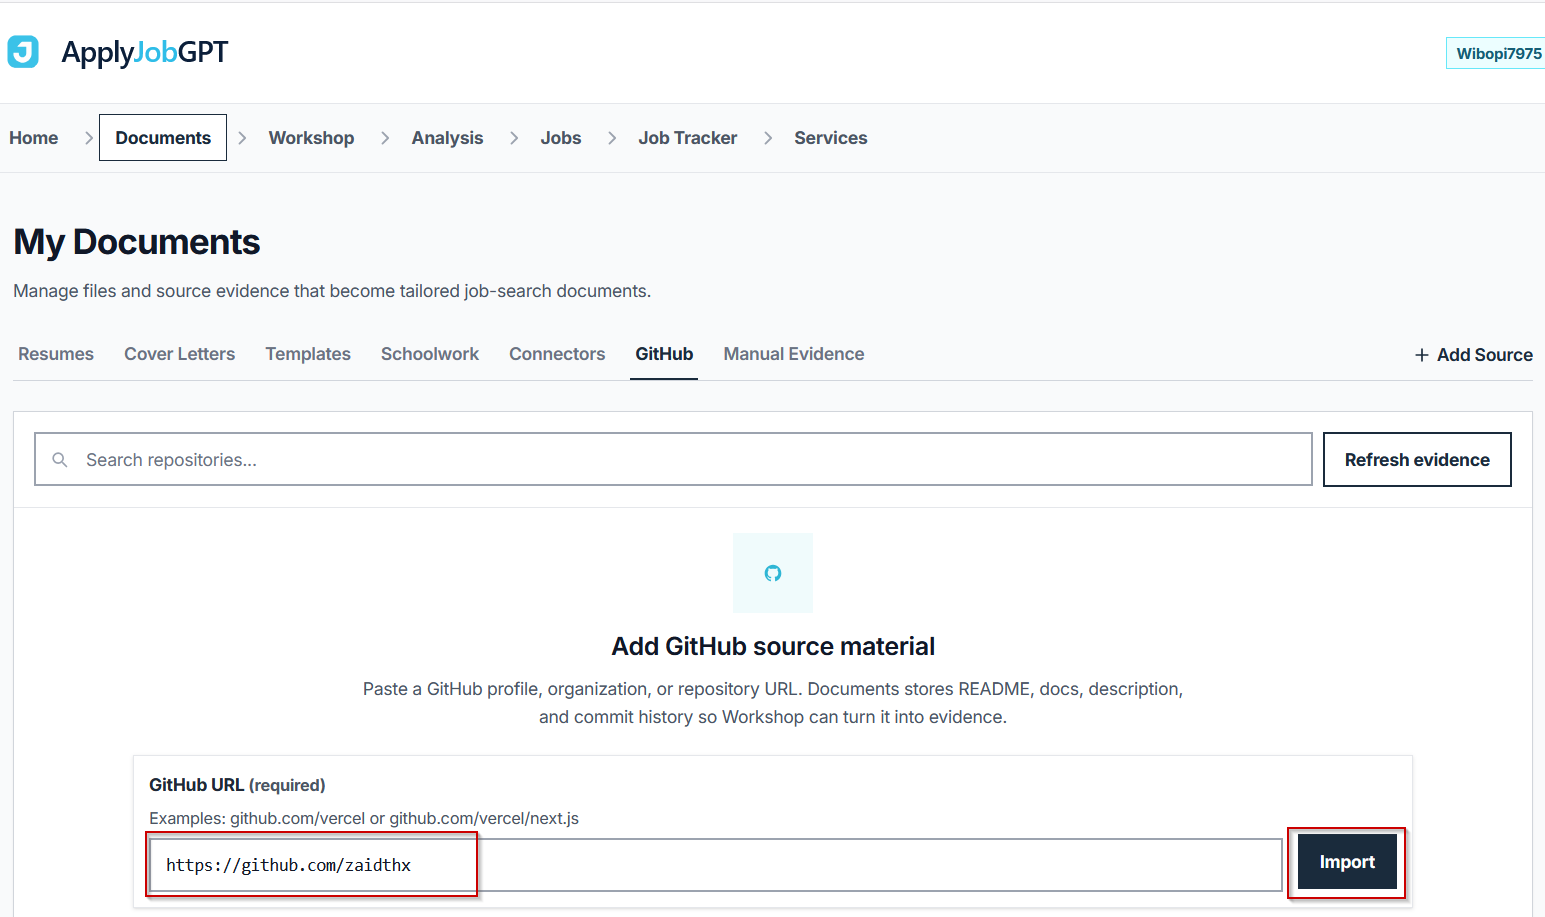
A common mistake here is pasting a single repository URL instead of the profile URL. The import is built to read an entire profile at once, not one repo at a time.
Before moving on, check this:
- [ ] The correct profile URL was used, not an individual repo link
- [ ] Relevant projects are set to public on GitHub
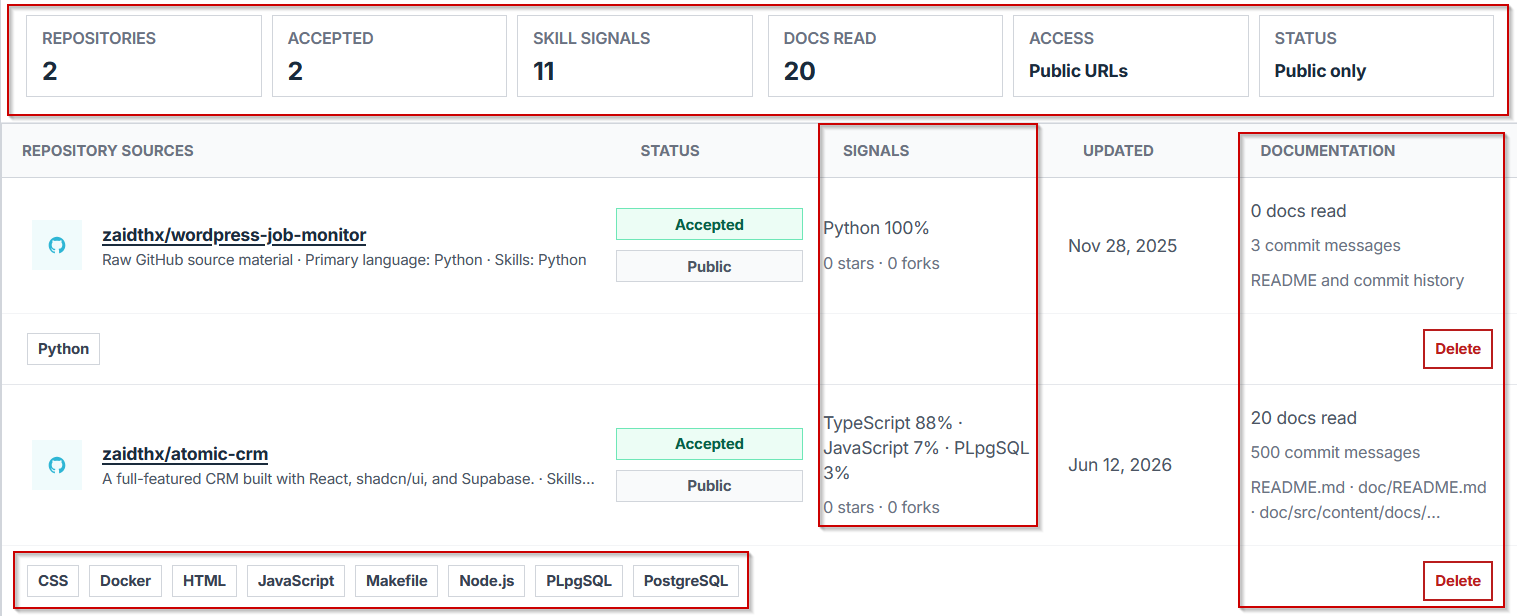
Step 3 — Review the Import Summary
Goal: Confirm what was pulled in before moving further into the workflow.
After the import completes, a summary appears showing the total repositories found, how many were accepted, the skill signals extracted from them, and how many documents were read (README files, commit messages, and any doc folders). The summary also confirms the access type, which will read as Public URLs, and the status, which will read as Public only, since private repos were excluded by design.
Below the summary, each repository appears as its own row listing the primary language, skill tags pulled from the code and docs, the last updated date, and the number of documents read from that specific repo. This is the point to catch anything obviously missing, such as a repository that should have been public but was not.
Before moving on, check this:
- [ ] All relevant repositories appear in the list
- [ ] Repos with little or no README content are noted as candidates for improvement before relying on them
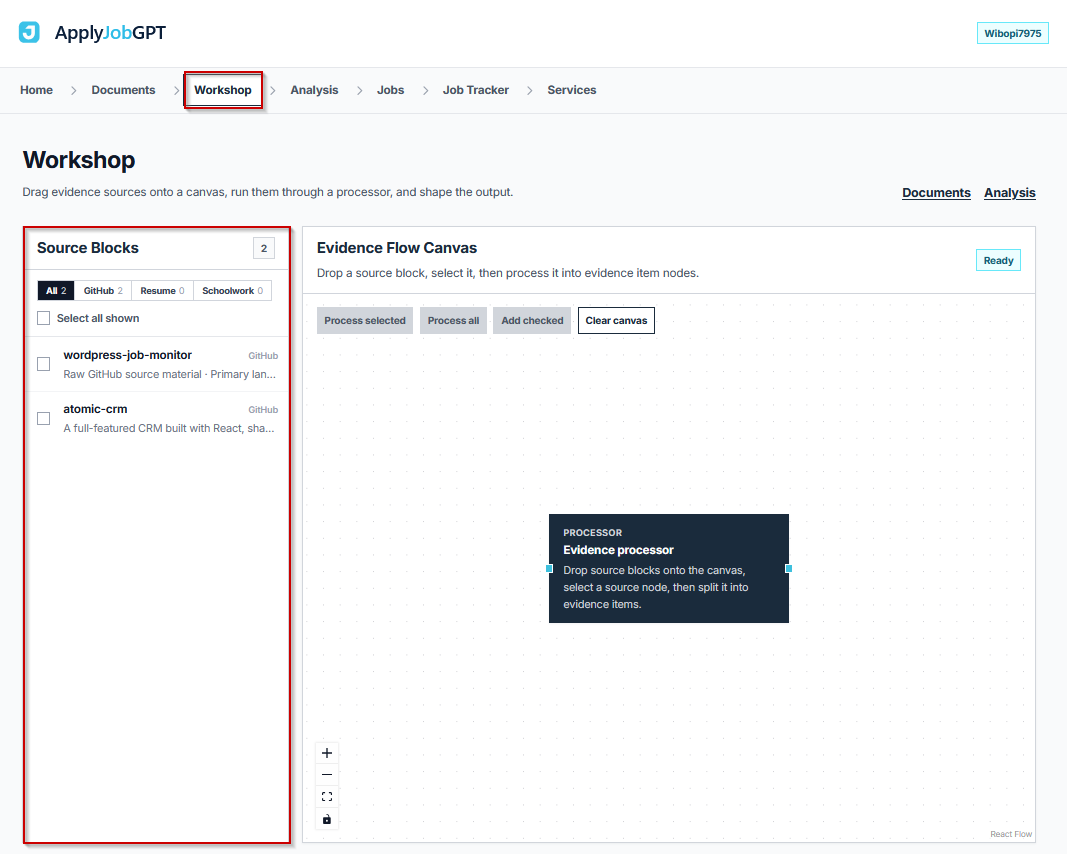
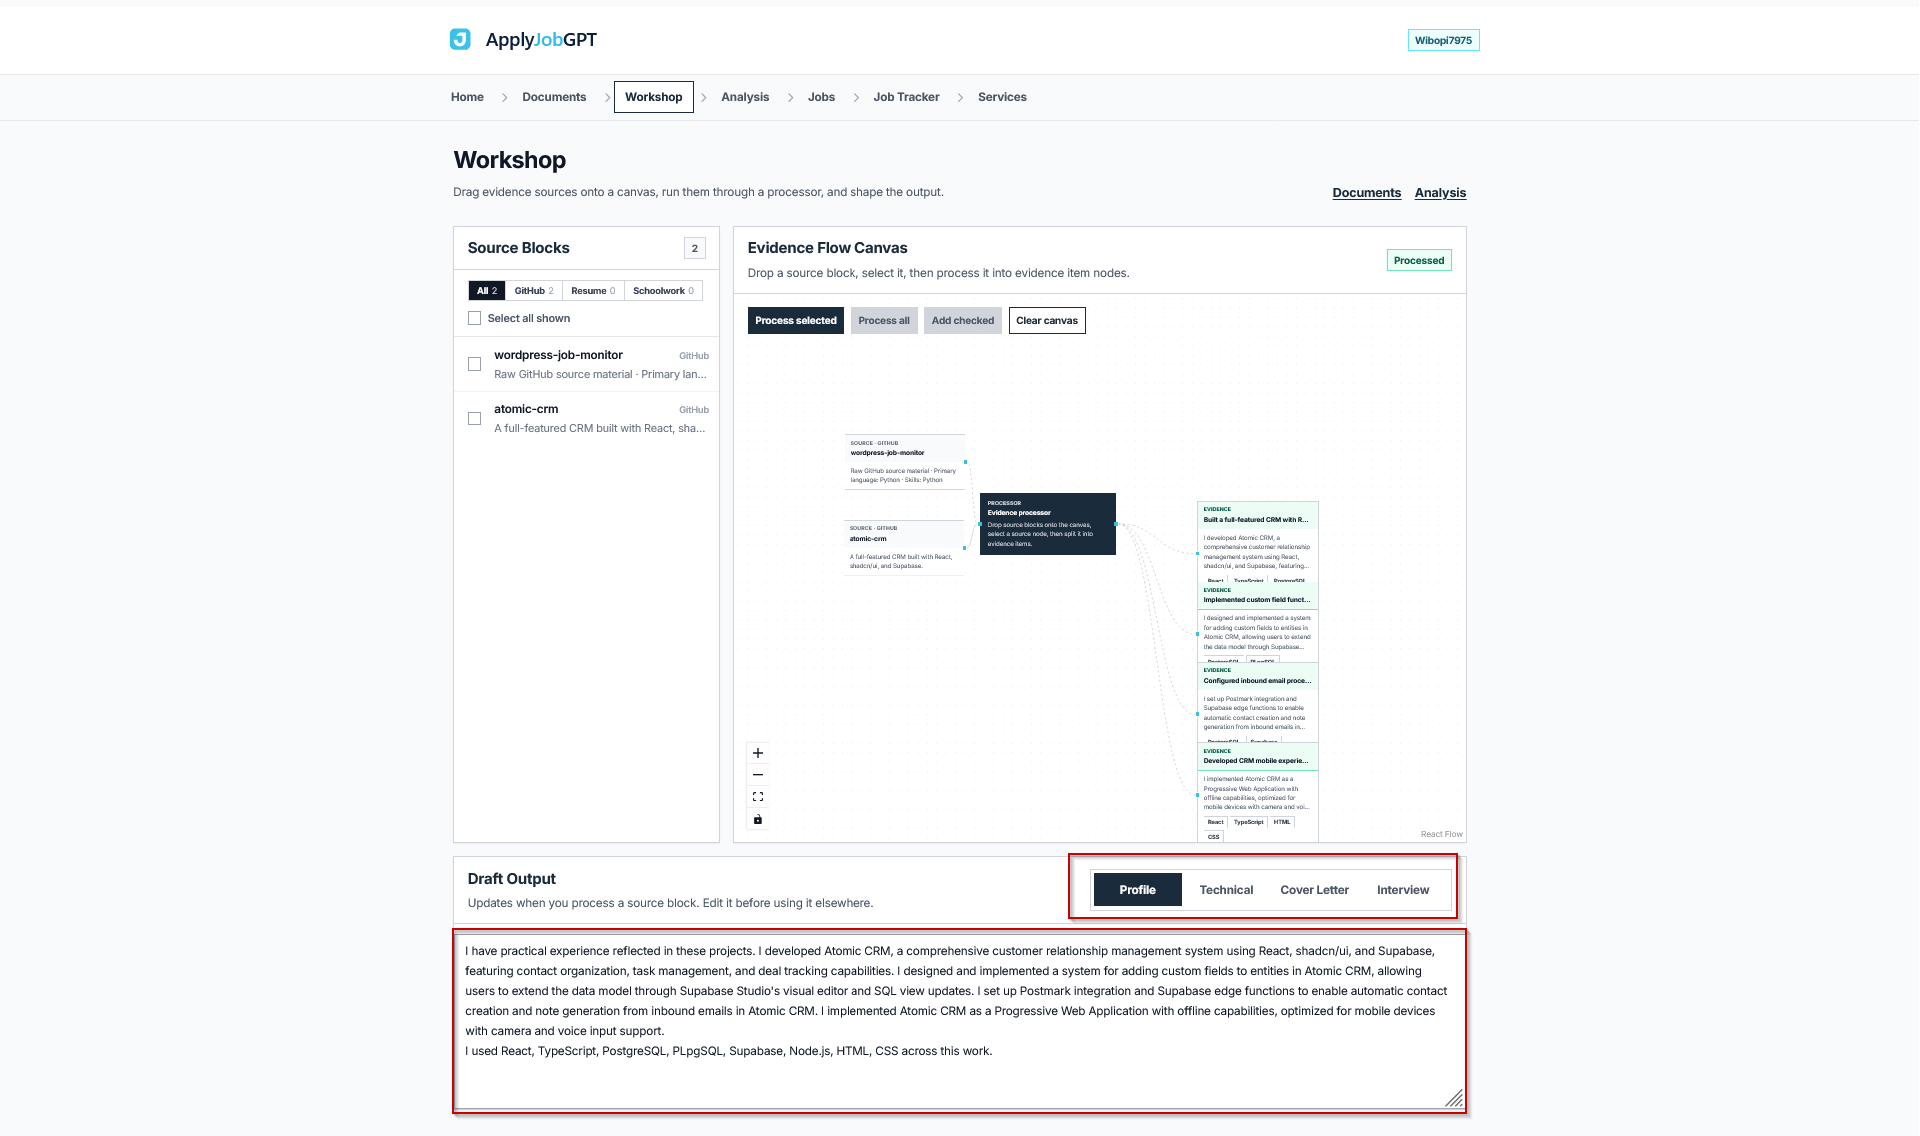
Step 4 — Open the Workshop
Goal: Move from raw import data into the workspace where repos get turned into evidence.
In the Workshop, every imported repository appears in the Source Blocks sidebar, filtered under GitHub. Each repository shows up as its own draggable block rather than a static list item, which is what makes the next step possible.
Before moving on, check this:
- [ ] The Workshop is open and the GitHub filter is selected
- [ ] Repo blocks are visible and appear correctly labeled
Step 5 — Drag Repos to the Canvas and Process Them
Goal: Convert selected repositories into structured evidence that downstream documents can pull from.
Dragging one or more repo blocks from the sidebar onto the Evidence Flow Canvas selects them for processing. After dragging the blocks, connect each repo block to the Evidence Processor node so the system knows which sources to process. Clicking Process Selected then triggers the Evidence Processor, which reads the README, commit history, and any documentation inside each connected repository and splits that material into individual Evidence items, which appear on the right side of the canvas.
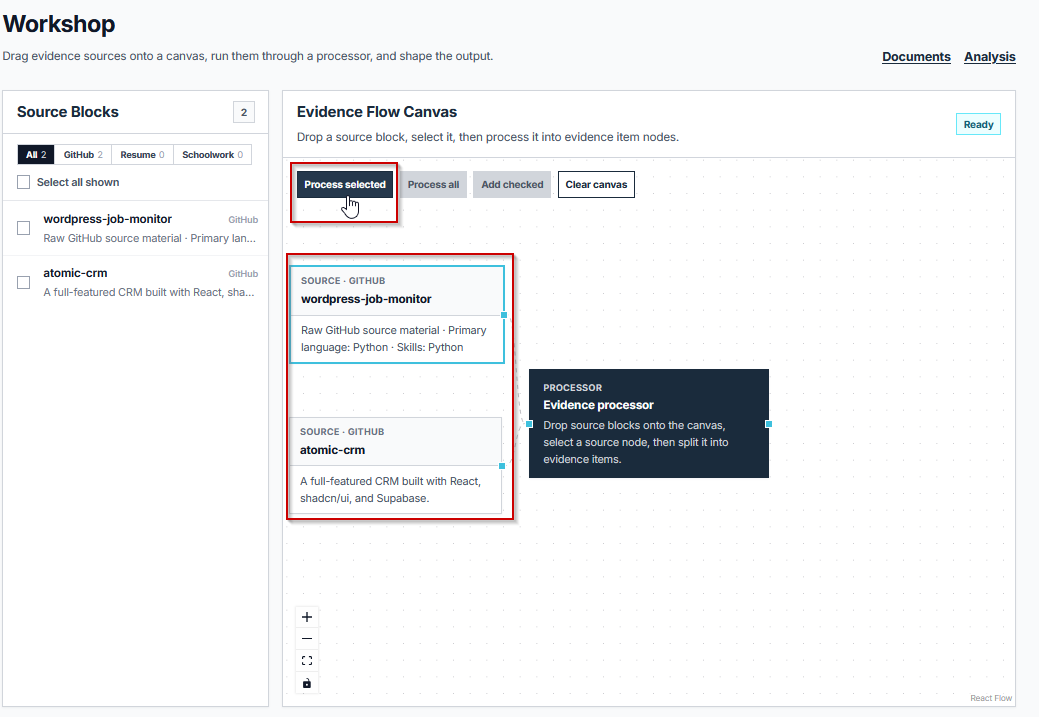
This step is where the real value sits: instead of one block representing "a project," the canvas ends up with discrete evidence items representing the stack used, problems solved, and specific decisions made during development. The job description being targeted should guide which repos get selected here. A marketing analytics internship and a backend engineering internship will likely call for different repos from the same profile.
Before moving on, check this:
- [ ] The repos most relevant to the target job description were selected
- [ ] Process Selected has been clicked and Evidence items appear on the canvas
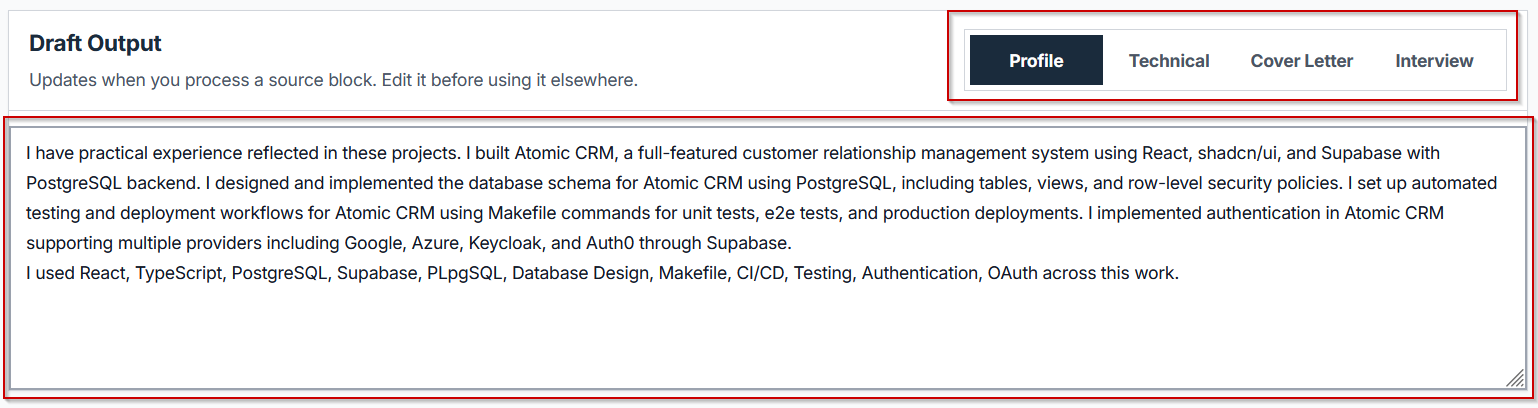
Step 6 — Review the Draft Output
Goal: Read through the generated material across Profile, Technical, Cover Letter, and Interview tabs, and confirm accuracy before using any of it.
The Draft Output panel at the bottom of the screen organizes the processed evidence into four tabs. Profile summarizes the overall skill set and project history in resume-ready language. Technical goes deeper into the stack, architecture decisions, and problems solved across the processed repos. Cover Letter drafts paragraph-level content connecting specific project work to the target role. Interview compiles talking points and likely follow-up questions based on what the commit history and documentation reveal about how the project was actually built.
Every line in these four tabs traces back to real repository content rather than generic phrasing, which is the entire point of running repos through the Evidence Processor in the first place. That said, this output is a draft. Reading through each tab and confirming that every claim matches what was actually built, removing anything that overstates involvement, and adjusting tone before it goes into an actual application remains necessary.
Before moving on, check this:
- [ ] The resume or cover letter content uses real, verifiable experience
- [ ] The job title and company name in the cover letter are correct
- [ ] Keywords from the job description appear naturally, not stuffed in
- [ ] The final wording sounds like a person wrote it, not a generic template
- [ ] The application materials are saved or added to a tracker
Example Walkthrough
Reader: A third-year computer science student with one part-time campus job, no formal internship yet, and three public GitHub repositories: a Flask API project, a React dashboard, and a small data pipeline script.
Goal: Applying for a backend-focused software engineering internship at a mid-size tech company.
Starting material: A one-page resume listing coursework and the campus job, with a single vague bullet under Projects reading "Built some coding projects in Python and JavaScript."
Job description focus: REST API design, Python, database work, and version control collaboration.
After importing the GitHub profile and processing the Flask API repo and the data pipeline repo (the React dashboard was skipped as a weaker match for this specific role), the Evidence Processor surfaced details that were not summarized anywhere on the original resume: the specific endpoints built, the database schema used, and a commit history showing iterative debugging on a rate-limiting issue.
| Before | After |
|---|---|
| "Built some coding projects in Python and JavaScript." | "Designed and built a REST API in Python (Flask) with five endpoints handling user authentication and rate limiting, backed by a PostgreSQL database." |
| "I am interested in this role and have experience with coding." | "The team's focus on API reliability lines up directly with a recent project building rate-limited REST endpoints in Flask, including debugging concurrency issues found through commit history." |
The resulting resume bullet and cover letter sentence both reference specific, verifiable work instead of a general claim about coding ability.
Common Mistakes to Avoid
| Mistake | Why It Hurts | Better Approach |
|---|---|---|
| Copying the draft output directly into a final application | Generated content can include phrasing that does not quite match how the applicant would naturally describe the work | Read every section, rewrite anything that sounds off, and confirm every technical claim is accurate |
| Listing skills the repo does not actually demonstrate | A skill tag pulled from a file extension or dependency does not always mean meaningful hands-on experience | Cross-check skill tags against actual involvement before including them |
| Using the same processed evidence for every job application | Different roles value different parts of the same project | Select and process the repos most relevant to each specific job description |
| Skipping the README cleanup before importing | Thin documentation produces thin evidence, since the Evidence Processor can only work with what is written | Add a short README with what the project does and the stack used before importing |
| Making the cover letter section too generic despite having strong evidence available | Generic phrasing wastes the specific, repo-based detail that was just generated | Pull at least one concrete technical detail from the Technical tab into the cover letter draft |
| Forgetting to track which version of the resume or cover letter was sent where | Submitting an outdated or mismatched version to the wrong company becomes more likely without tracking | Save or log the application immediately after exporting |
Where ApplyJobGPT Fits in the Workflow
ApplyJobGPT is useful here because it helps move from scattered evidence (a GitHub profile, a resume draft, a job description) into a more complete application workflow. Resume data, GitHub projects, coursework, and job preferences can all be added to the same profile, then used together to produce stronger, more specific application materials and to keep track of where each application stands.
Beyond the GitHub import covered in this tutorial, the platform supports:
- Matching a profile against relevant job postings
- Tailoring resume content to a specific job description
- Generating cover letters built from real background and project history
- Identifying missing keywords or weak sections before submitting
- Tracking applications instead of managing a spreadsheet manually
Final Checklist Before Applying
- [ ] The resume is tailored to this specific role, not a generic version
- [ ] The cover letter mentions the specific company and role
- [ ] Every project claim and technical detail is accurate
- [ ] Contact details are correct and current
- [ ] The file format matches what the job posting requests
- [ ] The application has been saved or logged in a tracker
- [ ] Everything has been reviewed once more before submitting
FAQs
Can ApplyJobGPT submit job applications automatically?
No. ApplyJobGPT helps build resume content, cover letters, and interview notes from real background and project data. Submitting the application itself is a separate, manual step.
Should the resume or cover letter still be reviewed after generation?
Yes. The draft output is built from real repository content, but AI-assisted drafting is a starting point, not a finished document. Reading through each section for accuracy and tone before sending is necessary every time.
Can students with limited work experience use this feature?
Yes. Coursework, school projects, GitHub repositories, volunteer work, and part-time jobs all count as real material. The GitHub import specifically helps students whose strongest evidence of technical skill exists in code rather than in a formal job history.
Does this only work for software engineering roles?
The GitHub import is most directly useful for technical roles where project work and code history are relevant evidence. Data, analytics, and other technically adjacent roles can also benefit, depending on what the repositories contain. Roles with no technical component will not get much value from this specific feature, though other parts of the platform can still help.
Is a credit card required to try this?
No credit card is required for the free trial as of this writing. Checking the current pricing page before signing up is a good habit, since terms can change.
What happens to private GitHub repositories during import?
They are skipped entirely. Only public repositories are read during the import step, so any project meant to be included in the application should be set to public on GitHub first.
Conclusion
Turning a GitHub profile into usable application material comes down to six steps: importing the profile, reviewing what got pulled in, moving into the Workshop, processing selected repos into structured evidence, and reading through the four-tab draft output before using any of it. The value of the process comes from how specific the result is. A resume bullet built from an actual commit history and a cover letter line referencing a real technical decision will consistently read stronger than a generic claim about coding ability, because the underlying evidence is real. Starting with one job description and one GitHub profile, then working through the import and processing steps above, is the most direct way to see whether this workflow fits a particular job search.
Changelog
2026-06-17— Published